
Sunday, December 25, 2011
Day 273
Not much to report, but I had three arcade tokens and set them on the left-hand side of the marquee. As we all from the golden days know, that is proper arcade etiquette meaning that you have the next game.

Tuesday, December 20, 2011
Day 268
Today since it was getting so close to Christmas and I wanted the unit to be operational, I decided to disable the emulators that were still giving me trouble. Most of them were working fine, but it was always some small detail: Can't start the game without some extra step, can't exit, etc. This included Turbografx 16, NES, Nintendo 64, Vectrex and Visual Pinball.
I also enabled the shutdown feature of Hyperspin so I wouldn't have to quit the program and then shutdown in Windows. Now if I can just make Windows XP more invisible in the startup / shutdown procedure, it'll be just fine.
I also wanted to add a wireless network card to the unit, so I could also add internet radio. Unfortunately the Linksys card I had lying around didn't support the security in my network, so that was out. Odd since that card was way newer than the old Airlink 101 cards we had. But that's Cisco for you.
Saturday, December 10, 2011
Day 258
One Game, One Button, One big pain in the butt.
Today I spent the majority of the day trying to get one game emulator to work properly in the cabinet. Kega Fusion which plays Sega Genesis games. Everything thing else in the program works just fine except for exiting the emulator and returning to Hyperspin.
Nothing I tried worked. Consulted with people in the Hyperspin forums, Fusion forums, you name it. The emulator just simply refused to acknowledge what Hyperspin was telling it to do.
So I thought, I'll hack an old keyboard and make one big button that represents the escape key and that should fix it. But I'm too lazy to go through the trouble.
So I found this link:
http://www.howtogeek.com/howto/windo...dows-xp-vista/
So I told Windows that one button on the X-Arcade Solo will represent the Escape key forever. Done.
Now Fusion behaves itself.
Thursday, December 1, 2011
Day 249
Today I worked on the marquee. I could have had it done professionally by a website that specialized in this sort of thing, but I was looking at least $30 for the size I needed.
I tried the local Kinko's, but I was looking at about $22 to get it done. But for now, I was still working on keeping my expenses low.
After leaving Kinko's, I went to the library to pick up a DVD I'd ordered on their website and I decided to ask the reference desk if they did color prints. They said yes, so I grabbed a computer, dropped my flash drive in and opened the graphic image in MS Publisher (yes I know, but it was the only program they had that could print banners).
So after fiddling with the sizing a bit, I sent it to the color laser printer, paid my $2.25 and took my pages home. I had to stretch the image across 3 sheets of paper, so I knew I'd be doing some arts and crafts for this thing.
So I got home, took the remaining plexiglass I had from the bezel, cut and fitted it. Then I cropped and pasted the three pages together and attached that to the back of the marquee sheet and settled it in place and attached the metal bar to hold it up.
 Not bad. You can see the seams between the pages, but I don't mind it. Maybe later if I find twenty bucks floating around I'll get it redone, but for now I'm quite pleased with it.
I've been fussing with the Hyperlaunch program to get all of the emulators to exit properly and I almost messed it up completely. My joystick can be reprogrammed to represent any key on the keyboard, so I tried to set up one of the keys to represent the Escape key and did the rest of the buttons as they were before.
It worked out all right, but there was a problem. For some reason there was about a 1 second hesitation between pressing a button and having the action executed. That's no good for video games. The response should be instantaneous. So I set it back to the factory default and left it there.
So I'm back to learning the script code for Hyperlaunch to get all the emulators to work. It's going to be tedious, but as soon as I get the whole thing working, the hard drive is going to be backed up and stored on DVD's in case something catastrophic happens.
I tried the local Kinko's, but I was looking at about $22 to get it done. But for now, I was still working on keeping my expenses low.
After leaving Kinko's, I went to the library to pick up a DVD I'd ordered on their website and I decided to ask the reference desk if they did color prints. They said yes, so I grabbed a computer, dropped my flash drive in and opened the graphic image in MS Publisher (yes I know, but it was the only program they had that could print banners).
So after fiddling with the sizing a bit, I sent it to the color laser printer, paid my $2.25 and took my pages home. I had to stretch the image across 3 sheets of paper, so I knew I'd be doing some arts and crafts for this thing.
So I got home, took the remaining plexiglass I had from the bezel, cut and fitted it. Then I cropped and pasted the three pages together and attached that to the back of the marquee sheet and settled it in place and attached the metal bar to hold it up.

I've been fussing with the Hyperlaunch program to get all of the emulators to exit properly and I almost messed it up completely. My joystick can be reprogrammed to represent any key on the keyboard, so I tried to set up one of the keys to represent the Escape key and did the rest of the buttons as they were before.
It worked out all right, but there was a problem. For some reason there was about a 1 second hesitation between pressing a button and having the action executed. That's no good for video games. The response should be instantaneous. So I set it back to the factory default and left it there.
So I'm back to learning the script code for Hyperlaunch to get all the emulators to work. It's going to be tedious, but as soon as I get the whole thing working, the hard drive is going to be backed up and stored on DVD's in case something catastrophic happens.
Thursday, November 10, 2011
Day 228
Today I got up the courage to do the bezel. I'd already had the plastic sheeting and I just needed the spray paint to finish the job. My biggest fear was that I'd screw this up completely and have to buy another sheet (around $20). I spoke to the guy in the paint department at Home Depot and he suggested a brand of spray paint that has a nozzle that isn't supposed to drip, run or spatter, and provides a nice wide spray.
So I cut the plastic to size and after a few trial and error tests of trying to put the bezel in place, I had to take the Dremel tool to take off some of the edge. Better to cut too little than too much, as my old Wood shop teacher used to say.
After finally getting it to fit in place, I took a china marker and marked the left and right sides and placed tick marks where the monitor shone through. Took the sheet back out, masked off the area where the monitor should be and spray painted the rest of the inside.
After it dried, I took the mask off and put the sheet in place. Not too shabby, says I.
 Now I have just enough plastic left over to do the marquee along the top. I still haven't established who will print the marquee art I've made up, so I'll do that today.
I also want to find some plastic stickers for the arcade control layouts. I'm hoping I'll find static cling stickers so I won't mess up the bezel.
So I cut the plastic to size and after a few trial and error tests of trying to put the bezel in place, I had to take the Dremel tool to take off some of the edge. Better to cut too little than too much, as my old Wood shop teacher used to say.
After finally getting it to fit in place, I took a china marker and marked the left and right sides and placed tick marks where the monitor shone through. Took the sheet back out, masked off the area where the monitor should be and spray painted the rest of the inside.
After it dried, I took the mask off and put the sheet in place. Not too shabby, says I.

I also want to find some plastic stickers for the arcade control layouts. I'm hoping I'll find static cling stickers so I won't mess up the bezel.
Monday, November 7, 2011
Day 225
Well, today I finally got my laser games to work. My problem was that there were two instances where I would have to press the escape key in order to progress into and out of the games. I fixed one of them by upgrading one of the modules within Hyperspin, called Hyperlaunch. Hyperlaunch is a sub-program which allows certain emulators and PC games to work within Hyperspin.
Once I had that in place, I got rid of one of the little windows that would pop up whenever I tried to run either Dragon's Lair or Space Ace.
The other issue was I couldn't get the key settings to stick in the Daphne emulator itself. So I went into the configuration file and made the changes manually.
I also (with the help of other users on the Hyperspin forum) fixed the onscreen theme that shows the available games. One of the graphic objects sat in front of the game wheel so you can't see which game you're selecting.
I got the plastic sheet from Home Depot for the front of the cabinet and I need to lay out where the monitor is located so I can paint one side and get it placed. I also need to print out and place the controller layout for the buttons depending on which emulator or jukebox program you're using. I want to get this sucker finished before Christmas so Amanda can help finish decorating the side art.
Monday, October 24, 2011
Day 211
Last Saturday, my X-Arcade Solo Console finally came in the mail. It seems that the post office didn't like the label the seller put on the package and they sent it back. So he had to resend it, this time in 2-3 Day Priority (like that means anything, the Post Office just sends it when they feel like it).
Anyway, setting it took no time at all. Windows XP recognized it immediately. The only thing is that it doesn't show up like a game controller. The movements of the stick and the buttons represent keyboard keystrokes. Not that it's a bad thing, it just took me by surprise.
Anyway, setting it took no time at all. Windows XP recognized it immediately. The only thing is that it doesn't show up like a game controller. The movements of the stick and the buttons represent keyboard keystrokes. Not that it's a bad thing, it just took me by surprise.
So far, most of the games are working just fine. Just got some fine-tuning to do and include a small program that will control the main volume via the stick and buttons. I'll have to get a trackball to sit alongside for some of the games, such as Centipede and Missile Command.
I got some new cable staples to replace the ones that came with the rope lights. The ones that are there now have a bit of a gap between the rope light and the surface of the cabinet edges. I'll get that done when I have a chance. I also need to resubmit my marquee to this banner company in Colorado. I didn't hear anything at all from them and I'm starting to think my submission got lost for whatever reason.
Friday, October 14, 2011
Day 201
Well, I spent the last few days filling in the blanks in Hyperspin and making the game menu wheels look nicer. I added Vectrex to the mix, but I'm still having difficulty getting the emulator to work within Hyperspin.
Anyway, last Sunday I was in Fuddruckers with my wife and they had wi-fi, so I thought I'd check my email. As soon as I connected to their internet, my Ipod Touch pinged me that an auction I'd been watching on Ebay was close to ending. Now this auction was for an X-Arcade Solo game panel.

X-Arcade's products are tough and they can withstand a lot of abuse. They're solid and well-made, which is why they command such a high price. When I saw this one on Ebay, there was one bid and it was going for $50 with free shipping. I figured I'd keep an eye on this and put it on my watch list.
Anyway, when my Ipod pinged me, I clicked on the view button and it opened up Ebay. It was going for $52 and there were two bids and there were two minutes left on the auction. So I put in my bid of $65 and it came up with me as the highest bidder.
So I waited, knowing full well that someone was going to snipe me and bid at the last second. But then the timer ran out and popped up with "You are the winner". So I paid the auction and now I sit....waiting...for the bloody Post Office to update their "Track and Confirm" web page. Hasn't been an update since this whole thing began. I realize that last Monday was a banker's holiday, but jeez. On one hand, the seller used Economy shipping, but on the other hand, he's only one state away. I hate waiting.
Meanwhile, I've been working on my marquee art. Not having used the graphics program Gimp in awhile, I had to re-learn a few things. But it doesn't look too bad...

Anyway, last Sunday I was in Fuddruckers with my wife and they had wi-fi, so I thought I'd check my email. As soon as I connected to their internet, my Ipod Touch pinged me that an auction I'd been watching on Ebay was close to ending. Now this auction was for an X-Arcade Solo game panel.
X-Arcade's products are tough and they can withstand a lot of abuse. They're solid and well-made, which is why they command such a high price. When I saw this one on Ebay, there was one bid and it was going for $50 with free shipping. I figured I'd keep an eye on this and put it on my watch list.
Anyway, when my Ipod pinged me, I clicked on the view button and it opened up Ebay. It was going for $52 and there were two bids and there were two minutes left on the auction. So I put in my bid of $65 and it came up with me as the highest bidder.
So I waited, knowing full well that someone was going to snipe me and bid at the last second. But then the timer ran out and popped up with "You are the winner". So I paid the auction and now I sit....waiting...for the bloody Post Office to update their "Track and Confirm" web page. Hasn't been an update since this whole thing began. I realize that last Monday was a banker's holiday, but jeez. On one hand, the seller used Economy shipping, but on the other hand, he's only one state away. I hate waiting.
Meanwhile, I've been working on my marquee art. Not having used the graphics program Gimp in awhile, I had to re-learn a few things. But it doesn't look too bad...

Friday, September 30, 2011
Day 187


 |
| So I thought, maybe the upper speaker grill would be large enough to reach through. |

Here's a small demonstration of the cabinet startup:
Monday, September 19, 2011
Day 176

I also got my audio switch in the mail the other day. Now I can mount this somewhere and I can switch from the cabinet speakers to headphones. The problem is, where. I don't want to drill any new holes and I want the switch to be reachable without any bending or stretching. The only logical place would be one of the two holes in the front panel where the gun hardware used to be mounted. I'm also looking into the possibility of putting in a USB hub in the other panel hole so I can plug a flash drive in (or perhaps a 2nd-player joystick). But considering the PC is located where the coin box used to be, that may be a moot point. Oh well, I'll blow up that bridge when I come to it.
I'm still working on the marquee art and I'm not quite happy with the font I used, so I went to 1001freefonts.com to get something a little more appropriate. The next step is to get the acrylic sheeting from Home Depot and get that prepped and mounted so the cabinet doesn't look so ghetto.
The hard part is getting the arcade controls. My wife isn't too thrilled with the idea of spending a lot of bucks on that, so I'm going to keep my eyes out for a pre-made panel with a USB connector for a price that won't make her give me stink-eye about buying it.

Friday, September 2, 2011
Day 159

Found a good Jukebox program called DWJukebox. Since I'm running low on hard drive space, I copied our music from the server onto a DVD and left it in the drive. The program has an unattended radio feature and I haven't explored that yet, but I do like the interface.
Yesterday was a test in patience as I started to work on the side art. I got two rolls of black contact paper and I worked on the side that would normally faced the wall, in case I really borked it up. But it was quite forgiving and didn't look too bad once I finished it. I'll post pictures once I've gotten both sides done. I decided to do the artwork based on this idea I found at the arcadecontrols website (http://forum.arcadecontrols.com/index.php?topic=102621.0).
I also decided on a name for the cabinet. Whilest Googling for information on what other people did for side art, I kept seeing that same phrase: "I want my quarters back". So I decided to call it, Quartersback Arcade. At least it'll do until I come up with something a little more catchy.
Tuesday, July 19, 2011
Day 114


Sunday, July 17, 2011
Day 112
Well, I spent a good part of last night and this morning going through each and every entry in Hyperspin under the MAME section removing bad game entries and prettying-up the ones that worked. A lot of my favorites need to be replaced and that shouldn't be any problem. I'll post a video on YouTube when I get a chance.
Amanda was my Beta-tester. So far, everything is working, but the controller is frustrating to use under these circumstances. Oh well. Eventually, I can get to the point where I'll have proper controls and can hide the keyboard and mouse.
I need to find a better jukebox. It's simple to use, but some features just aren't there. I may just have a program running in the background that can be controlled by the joystick and buttons. The old Winamp program might do nicely. I'll have to see if the screensaver can kick in on its own. Anyway, I digress.
Now I've got to replace the games that went bad and start adding the other emulators. I think I'll work on the Super Nintendo next. The ones that worry me are the laser games like Dragon's Lair and Space Ace. Those can be huge and I'll have to see if I have enough hard drive space left. 30 Gigabytes don't go as far as they used to.
Thursday, July 14, 2011
Day 109

I found that I could not insert the monitor while the riser was in place, so I attempted to wrestle the 50 pound monitor into the cabinet whilst placing the riser underneath. The effect of which is like trying to add a floor on a house underneath the first floor. So I asked my mother to place the riser while I held the monitor up. Almost didn't make that either, but with a bit of coaxing and swearing we managed to get them in place.
After that, I got the brackets in place to keep it from swaying about.

From here, I put in the mini-tower and the rest of the guts. I removed the marquee and uninstalled the speakers and put the two satellite speakers in their place.

That should get it to an operational state. After that I'll start the process of prettying-up the cabinet with new side art, a marquee and the bezel to hide the monitor and the interior.
Wednesday, July 13, 2011
Day 108

Now I just need to add the monitor and get the thing settled into place and bolted. I'll have to wait till tomorrow at least. Too much to do this evening.
Thursday, June 16, 2011
Day 80

Anyway, I spent the last few free days attaching the new wheels I got to the bottom of the cabinet. I removed the existing metal feet since they were worn completely through anyway.

Getting the cabinet to lean against the wall and propping it there with a cinder block was the fun part. Nothing like adding an element of danger to one's work. In my last post, I'd determined that I would use Game Launcher. The problem I encountered between then and now is that I couldn't get the jukebox or some of the other emulators to work properly. So after much scrounging, I found a copy of Windows XP and went back to using Hyperspin. So far, it's coming along quite well. I downloaded demo videos from emumovies.com to display on the screen when you're selecting the games you want.


Sunday, April 24, 2011
Day 28
This is the third test for the best OS for the cabinet. Windows 2000 was a bust (the no-fun version), Linux Mint was good, but the emulators are hit-or-miss, so after thinking about it, I came to realize that the time when all the emulators ran well and the OS didn't get on my nerves was Windows 98.
So after testing two 15 Gb drives I had in the garage and found both of them were totally trashed due to the master boot record being corrupted and unrecoverable, I pulled the secondary hard drive from my primary computer and used it. The nice thing was that the drive was already partitioned into three drives, the other two already being used for the games I've had on for years.
I decided on "Game Launcher", which is a nice, simple, DOS-based front end for all of the emulators and plays well with joystick control, eliminating the need for a keyboard and mouse. After a few trial and error attempts, MAME was working with no trouble. As soon as I have the screenshots for each game pasted, that'll be done. After that, I can add the Nintendo SNES, Vectrex, Turbografix 16, PinMAME, and so on and so forth. I'm also hoping to get the Daphne emulator running so I can incorporate the laser disc games.
 Meanwhile, I found someone in Oceanside giving away two old-fashioned CRT monitors. One of them being a 19-inch, which should do nicely. Now I just need to build the shelf for it to sit on inside the cabinet, something strong as this sucker is heavy.
This weekend, we moved the cabinet from the garage to the family room and moved the exercise equipment to the garage to set up a work-out station. Three pieces of equipment were too big for the room anyway. It went better than I expected, as the arcade cabinet weighs a ton and we had to walk it in.
So after testing two 15 Gb drives I had in the garage and found both of them were totally trashed due to the master boot record being corrupted and unrecoverable, I pulled the secondary hard drive from my primary computer and used it. The nice thing was that the drive was already partitioned into three drives, the other two already being used for the games I've had on for years.
I decided on "Game Launcher", which is a nice, simple, DOS-based front end for all of the emulators and plays well with joystick control, eliminating the need for a keyboard and mouse. After a few trial and error attempts, MAME was working with no trouble. As soon as I have the screenshots for each game pasted, that'll be done. After that, I can add the Nintendo SNES, Vectrex, Turbografix 16, PinMAME, and so on and so forth. I'm also hoping to get the Daphne emulator running so I can incorporate the laser disc games.

This weekend, we moved the cabinet from the garage to the family room and moved the exercise equipment to the garage to set up a work-out station. Three pieces of equipment were too big for the room anyway. It went better than I expected, as the arcade cabinet weighs a ton and we had to walk it in.
Wednesday, April 6, 2011
Day 10

I used the ShuttleX case I got whilst working at SOE (thanks, DennisG). I put in a measly 20 Gb hard drive just for the environment and will put in a secondary drive for the larger games (laser disc games, etc.)
It also supported the Playstation 2 game controller I connected without any trouble. It's just temporary until I get the arcade controls later on.
Now I just gotta keep my eye on a free monitor on Craigslist (somewhere between 19 and 24 inches). With everyone trying to get rid of their CRT monitors, that shouldn't take too long.
I found a front-end for MAME that also supports other emulators as well as an mp3 jukebox. Still got a lot of work to do to stabilize this system and make it automated, but it's coming right along.
Wednesday, March 30, 2011
Day 3
Today, I reinstalled the screws I had removed last Sunday and got the cabinet reinforced again. Had to flip it on its side to put enough pressure for the screws to go in.
 While I had it flipped, I took a look at the metal feet. Man, are they worn out. Gotta find a stronger set.
 I needed a marquee light, so I installed the one I already had. I drilled the wire hole just a bit for the cord to feed through.
Now I just need to get my hands on a monitor. I'm thinking 26" or 19". With people getting rid of CRT monitors for free, that shouldn't take too long.
The biggest problem I'm having is trying to decide what Operating System to hold all the games, and so forth. The good front-end programs I'm using (Hyperspin) is only made for Windows, but I think I'll experiment with Linux WINE and see how it goes.
Monday, March 28, 2011
Day 1
They say every man goes through a Mid-Life Crisis. Usually having to do with motorcycles, cars, and so forth. These can be very expensive hobbies and I've kind of had an outlook of re purposing objects. I love reading DIY websites and IkeaHack and so forth. I'm always impressed with people who have an imagination big enough to make something awesome, even if it's just for themselves.
I've always wanted to build my own arcade machine, from the day I first played Space Invaders and said to my friends, "I'm gonna get ME one of these". I shudder to think how much money I've thrown down playing video games since 1974 and I feel the time has come to gain back some of my childhood.
Yesterday, someone posted a gutted arcade cabinet in Craigslist for free and I jumped on it. I didn't really think he'd respond to me, considering how much in demand these cabinets are. But he did and I made it my quest to get it.
We drove to La Costa, hoping the blasted thing would fit in my Honda Fit. Everything so far has. But when we got there, we found there was no way it was going to happen. I'd already resolved to disassemble the thing right there and I'd brought tools, though I quickly found out that these were designed NOT to be taken apart. It was put together with glue, wood staples and bolts.
So I asked him to hang onto it until the next morning (this morning). Getting up early, my wife and I went down to Home Depot and rented a flatbed truck with a dolly, drove back down and just about killed ourselves getting that puppy back home.
So there it sits: a 1994 Lethal Enforcers 2: Gunfighters cabinet with some 17 years of wear and tear, cigarette burns on the joystick panel and kick marks from years of kids wishing they had played Q*Bert instead.
 I brushed it down and wiped it with a combination of glass cleaner and vinegar and it didn't look all that shabby afterward.
 I opened the coin door to have a look. I love the fact that the door is still there. I'm gonna make those coin slots glow even if they don't work.
 The original locks on the coin door were missing, so there was a overlay locking panel in front of it. All the better for my piggy bank.
 I opened the marquee panel and found that the original speakers were still there. I'm still deciding whether to leave them there and use them or replace them with the 2.1 speaker system I have. I guess it depends on how they sound.
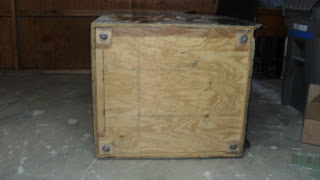
 I found that with the razor scraper I have and a hair dryer to help melt the glue, it was relatively easy to remove the side art panels. I want to make my own anyway.
 One of the back edges had gotten broken. Being particle board, it wasn't difficult to fix. Lacking in clamps to hold the broken piece into place, I wedged a board against the wall which should work until the glue cures.
So I sat back and looked at it for a long time, realizing that it has a lot of history behind it, a lot of people who played it and either hated it or loved it. It probably sat in some bar or old arcade and heard a lot of passing lives, loves, anxieties. I decided that the dings, scratches, cigarette burns and small busted chunks of wood revealed its character and I wanted to keep the renovations to a minimum. Aside from the buttons, sticks, lights, side art and marquee panel I put in, I'd leave it the way it is.
I've always wanted to build my own arcade machine, from the day I first played Space Invaders and said to my friends, "I'm gonna get ME one of these". I shudder to think how much money I've thrown down playing video games since 1974 and I feel the time has come to gain back some of my childhood.
Yesterday, someone posted a gutted arcade cabinet in Craigslist for free and I jumped on it. I didn't really think he'd respond to me, considering how much in demand these cabinets are. But he did and I made it my quest to get it.
We drove to La Costa, hoping the blasted thing would fit in my Honda Fit. Everything so far has. But when we got there, we found there was no way it was going to happen. I'd already resolved to disassemble the thing right there and I'd brought tools, though I quickly found out that these were designed NOT to be taken apart. It was put together with glue, wood staples and bolts.
So I asked him to hang onto it until the next morning (this morning). Getting up early, my wife and I went down to Home Depot and rented a flatbed truck with a dolly, drove back down and just about killed ourselves getting that puppy back home.
So there it sits: a 1994 Lethal Enforcers 2: Gunfighters cabinet with some 17 years of wear and tear, cigarette burns on the joystick panel and kick marks from years of kids wishing they had played Q*Bert instead.


 I found that with the razor scraper I have and a hair dryer to help melt the glue, it was relatively easy to remove the side art panels. I want to make my own anyway.
So I sat back and looked at it for a long time, realizing that it has a lot of history behind it, a lot of people who played it and either hated it or loved it. It probably sat in some bar or old arcade and heard a lot of passing lives, loves, anxieties. I decided that the dings, scratches, cigarette burns and small busted chunks of wood revealed its character and I wanted to keep the renovations to a minimum. Aside from the buttons, sticks, lights, side art and marquee panel I put in, I'd leave it the way it is.
Subscribe to:
Posts (Atom)